

So you've built a killer Django application. The models are tight, the admin is humming, and your server side templates are doing exactly what they should. Then, the inevitable happens.
Someone asks, "Hey, can we get an API for the new mobile app?" Or maybe you're itching to plug in a modern frontend like React or Vue. Suddenly, just serving up HTML isn't going to cut it anymore.
This is a classic crossroads for a Django developer. I've been there. The first time I hit this wall, I remember spending hours just trying to figure out how to wrestle my perfectly good Django models into clean, predictable JSON. I tried building the JSON responses by hand, which I now know is a nightmare I recommend everyone avoid. The whole concept of a "serializer" felt like some kind of dark art.
The Inevitable Turn to DRF
After fumbling around with a few different approaches, I finally landed on Django REST Framework (DRF). And it was a revelation. This wasn't just another app to pip install; it was a complete, thoughtfully designed toolkit built specifically to solve this exact problem.
It turns out, I wasn't alone. A massive chunk of the Django world relies on it.
Django REST Framework is the undisputed king of API development in the Django ecosystem. With 14.4 million monthly downloads compared to Django's 27.9 million, DRF finds its way into more than half of all Django projects. That's not just popular; that's practically essential. You can dive deeper into these trends in this community discussion on Django's ecosystem.
This is a key realization: DRF isn't some minor add on. For many projects, it becomes the backbone of the application, opening it up to communicate with literally any other service, frontend, or mobile app you can throw at it.
Just take a look at the official DRF homepage.
The first thing they show off is the browsable API. This single feature has saved me and countless other developers an insane amount of time during development and debugging. It's a game changer.
Our Journey Starts Here
In this Django REST Framework tutorial, we're not just going to skim the surface. We're going to take a journey from a familiar problem to a solid solution. We will start with a familiar Django project that has two simple models, Book and Author, and we will methodically build out a secure, efficient, and production grade API.
This is where you make the leap from being a web developer to becoming an API architect. Let's get started.
Building Your Foundational API Endpoint The Right Way
Alright, enough theory. It's time to get our hands dirty and actually build something. This is where we shift from abstract concepts to concrete code, laying down the essential groundwork for our API. We're not just mindlessly copying snippets here; we're going to assemble the core components of Django REST Framework and see how they all talk to each other.
Our goal is simple but absolutely critical. We're going to take our Book model and expose it to the outside world through a standard set of API endpoints. This means letting clients fetch a list of all books, retrieve a single one, create a new one, update an existing book, and yes, even delete it.
Let's get the project set up.
Installing and Configuring DRF
First things first, we need to pull DRF into our project. If you've got your Django virtual environment activated, this command should feel very familiar.
pip install djangorestframework
Once that's done, we need to let Django know this new app actually exists. We register it just like any other app by adding it to the INSTALLED_APPS list inside settings.py.
settings.py
INSTALLED_APPS = [
# ... other apps
'rest_framework',
'books', # Our app with the Book and Author models
]
This simple step does more than you'd think. It makes all of DRF's powerful tools—from serializers to generic views—available for us to use. It's the classic journey from having a standard Django project to realizing you need an API, which leads directly to pulling in DRF as the solution.
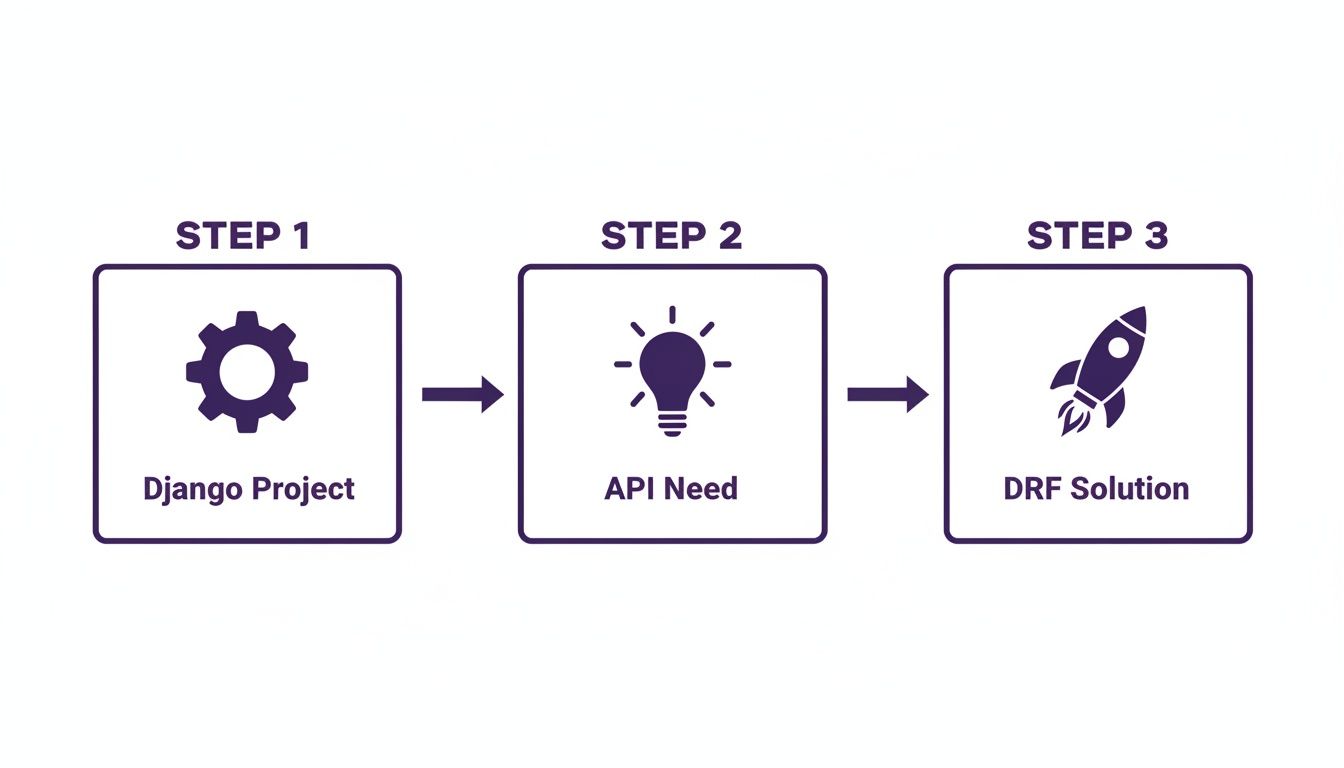
This progression is a rite of passage for many Django developers. The moment you need to serve data to a frontend app or a mobile client, DRF becomes your best friend.
Demystifying the Serializer
The first real DRF component we need to tackle is the Serializer. I remember getting hung up on this concept when I first started. The best way I've found to think about it is like this: a serializer is a translator.
Your Django model instance is a complex Python object, loaded with methods and database connections. An API client, like a React frontend or a mobile app, doesn't understand any of that. It speaks a much simpler language, usually JSON. The serializer is the bilingual expert that handles the conversion between these two different worlds.
Luckily, DRF gives us a fantastic shortcut called a ModelSerializer. Instead of manually defining every single field and validation rule, we can just point it at our Book model. It will intelligently inspect the model and create the necessary fields for us.
Let's create a new file, books/serializers.py, and define our first one.
books/serializers.py
from rest_framework import serializers
from .models import Book
class BookSerializer(serializers.ModelSerializer):
class Meta:
model = Book
fields = ['id', 'title', 'author', 'publication_year']
That's it. Seriously. This small class is now powerful enough to turn a Book object into JSON and, just as importantly, validate incoming JSON to create or update a Book instance in our database. It's incredibly concise but does a massive amount of heavy lifting.
Crafting the Views
With our translator ready to go, we now need a way to handle incoming web requests. In the Django world, that's the job of a view. DRF builds on Django's own class based views, offering a set of "generic" views designed specifically for common API tasks.
For our Book model, we really only need two kinds of views:
- One to handle listing all books and creating a new one (GET and POST on
/api/books/). - Another to handle fetching, updating, or deleting a specific book (GET, PUT, and DELETE on
/api/books/<id>/).
DRF provides ListCreateAPIView and RetrieveUpdateDestroyAPIView, which do exactly that, right out of the box.
Let's update our books/views.py:
books/views.py
from rest_framework import generics
from .models import Book
from .serializers import BookSerializer
class BookListCreateAPIView(generics.ListCreateAPIView):
queryset = Book.objects.all()
serializer_class = BookSerializer
class BookRetrieveUpdateDestroyAPIView(generics.RetrieveUpdateDestroyAPIView):
queryset = Book.objects.all()
serializer_class = BookSerializer
Look how clean that is. We just have to tell the views two things: what data to work with (queryset) and which translator to use (serializer_class). DRF takes care of all the internal logic for handling different HTTP methods.
Wiring Up the URLs
The final piece of this puzzle is connecting our shiny new views to specific URL patterns. This tells Django that when a request for /api/books/ comes in, it should pass it off to our BookListCreateAPIView.
We'll create a dedicated books/urls.py file to keep our app's URLs nicely organized.
books/urls.py
from django.urls import path
from .views import BookListCreateAPIView, BookRetrieveUpdateDestroyAPIView
urlpatterns = [
path('books/', BookListCreateAPIView.as_view(), name='book list create'),
path('books/int:pk/', BookRetrieveUpdateDestroyAPIView.as_view(), name='book detail'),
]
Next, we just need to include this file in our project's main urls.py.
project/urls.py
from django.contrib import admin
from django.urls import path, include
urlpatterns = [
path('admin/', admin.site.urls),
path('api/', include('books.urls')), # Include our app's URLs
]
With these few pieces in place, we now have a fully functional API endpoint. This foundation is a critical checkpoint. Before we go deeper, let's reflect. We took a plain Django model and, with just three components (Serializer, View, URL), exposed it as a full CRUD API. To ensure what we build is truly production grade, it's worth exploring these 10 pragmatic best practices for REST API design, which cover crucial topics like naming conventions and status code usage.
You've officially leveled up from a Django developer to an API creator.
Moving From A Public API To Secure Endpoints
So, we've built a functional API. You can create, read, update, and delete books. It feels great, right?
But there's a giant, gaping hole in our setup. Right now, anyone on the internet can perform any of those actions. An anonymous user could, in theory, wipe out our entire book database with a single DELETE request. That's a terrifying thought for any production grade application.
This is the moment we move from a fun hobby project to a serious application. We need to lock things down. Let's dive headfirst into DRF's powerful and flexible authentication and permission system.
Introducing Authentication: The Gatekeeper
Authentication is all about answering one simple question: "Who are you?" Before our API does anything, it needs to identify the user making the request. DRF comes with several built in authentication schemes, but two are incredibly common:
- SessionAuthentication: This is the classic Django approach. It uses the session framework and is perfect when your frontend and backend are on the same domain.
- TokenAuthentication: This is the workhorse for disconnected systems, like a mobile app or a single page application (SPA) built with React. The client sends a unique token with every request to prove its identity.
For our API, we'll focus on TokenAuthentication, as it's the most versatile for modern architectures. To learn more about the different methods, our guide on Django REST Framework authentication offers a much deeper dive.
First, add rest_framework.authtoken to your INSTALLED_APPS and run migrations. This sets up the database table DRF needs to store the tokens.
Next, we need a way to generate these tokens for our users. We can expose an endpoint for this, but for now, DRF provides a handy management command to generate one manually for testing.
python manage.py drf_create_token <username>
This command will spit out a token that a client can then include in their request headers. It's a standard format you'll see everywhere.
Authorization: Token 9944b09199c62bcf9418ad846dd0e4bbdfc6ee4b
With the token system in place, we can now tell our views to use this authentication method by setting a global default in settings.py.
settings.py
REST_FRAMEWORK = {
'DEFAULT_AUTHENTICATION_CLASSES': [
'rest_framework.authentication.TokenAuthentication',
],
'DEFAULT_PERMISSION_CLASSES': [
'rest_framework.permissions.IsAuthenticated',
]
}
By adding IsAuthenticated as a default permission, we've just put up a huge wall. Now, any request to our API without a valid token will be met with a 401 Unauthorized error. Our data is no longer public.
Granular Control With Permissions
Authentication tells us who the user is, but permissions decide what they are allowed to do. Blocking anonymous users is a great start, but it's not enough. Right now, any logged in user can edit or delete any book, even one they didn't create. That's not right.
We need a more nuanced rule: any authenticated user can view the list of books, but only the author of a specific book can update or delete it. This requires a custom permission.
Let's create a new books/permissions.py file.
books/permissions.py
from rest_framework import permissions
class IsAuthorOrReadOnly(permissions.BasePermission):
"""
Custom permission to only allow authors of an object to edit it.
"""
def has_object_permission(self, request, view, obj):
# Read permissions are allowed to any request,
# so we'll always allow GET, HEAD or OPTIONS requests.
if request.method in permissions.SAFE_METHODS:
return True
    # Write permissions are only allowed to the author of the book.
    return obj.author == request.user
This class is beautifully simple. It checks if the request method is a "safe" one (like GET). If so, it allows access. If it's a write method (like PUT or DELETE), it checks if the book's author matches the user making the request.
DRF includes a handful of these built in permission classes that cover most common scenarios.
Common DRF Permission Classes At A Glance
Here's a quick reference table to help you choose the right permission class for the job.
| Permission Class | What It Does | Typical Use Case |
|---|---|---|
| AllowAny | Allows unrestricted access, regardless of authentication. | Public facing endpoints, like a product catalog or a registration page. |
| IsAuthenticated | Allows access only to authenticated users. Denies everyone else. | The most common default. Protects any endpoint that requires a logged in user. |
| IsAdminUser | Allows access only to users where is_staff is True. |
Endpoints for site administrators, like a user management dashboard. |
| IsAuthenticatedOrReadOnly | Allows authenticated users to perform any action, but allows read only access for unauthenticated users. | Public APIs where anyone can view data, but only registered users can create or modify it. |
Knowing these will save you from writing custom permissions for common patterns.
Finally, let's apply our new custom permission to the detail view—the one that handles individual book objects.
books/views.py
from .permissions import IsAuthorOrReadOnly
from rest_framework.permissions import IsAuthenticated
class BookRetrieveUpdateDestroyAPIView(generics.RetrieveUpdateDestroyAPIView):
queryset = Book.objects.all()
serializer_class = BookSerializer
permission_classes = [IsAuthenticated, IsAuthorOrReadOnly]
Checkpoint: We have now secured our API on two levels. First, we require all users to be authenticated via a token. Second, for actions that modify data, we ensure the user has object level permission—meaning they are the author of the resource. This is the foundation of building a secure and trustworthy API.
This progression from a wide open endpoint to one with layered, logical security rules is a massive step. Your API is no longer a free for all; it's a controlled system that respects data ownership.
Making Your API Smarter With Filtering And Pagination
Alright, our API is secure, but it's still a bit naive. If you ask it for books, it hands over every single book in the database. When you have ten books, that's fine. When you have ten thousand, your API will grind to a halt, the server will groan, and the user experience will be just awful.
I once worked on a project where a seemingly simple endpoint was causing massive latency spikes. It turned out the frontend was fetching a list of all users, which had ballooned from a few hundred to over 50,000. The fix? Exactly what we're about to do: add pagination and filtering.
This is the step where we stop just dumping data and start serving it gracefully.
Taming Large Datasets With Pagination
Pagination is simply the art of breaking a huge result set into smaller, manageable chunks or "pages." Instead of one giant, slow request, the client makes smaller, faster requests for each page as needed. Django REST Framework makes this incredibly easy and offers a few different styles right out of the box.
- PageNumberPagination: This is the classic
?page=2style you see everywhere. It's intuitive and works great for most use cases. - LimitOffsetPagination: A bit more flexible for clients. They can request
?limit=10&offset=20to get 10 items starting from the 21st. - CursorPagination: The most performant option for massive, frequently changing datasets. It uses a cursor to point to the next page, avoiding slow database offsets.
For most projects, PageNumberPagination is the perfect place to start. The best part? We can set it globally in settings.py and it will automatically apply to every list view in our project.
settings.py
REST_FRAMEWORK = {
# ... your other settings
'DEFAULT_PAGINATION_CLASS': 'rest_framework.pagination.PageNumberPagination',
'PAGE_SIZE': 10
}
With just those two lines, every list endpoint in our API is now paginated. Any request to /api/books/ will return the first 10 books along with links to the next and previous pages. That's a huge performance win with almost zero effort.
Letting Users Search With Filtering
Pagination solves the "too much data" problem, but what about the "not the right data" problem? Users shouldn't have to page through hundreds of results to find a book by a specific author. They should be able to ask for it directly. This is where filtering comes in.
The gold standard for filtering in DRF is a third party package called django-filter. Let's get it installed.
pip install django-filter
And, of course, we need to register it in our settings.py.
settings.py
INSTALLED_APPS = [
# ...
'django_filters',
'rest_framework',
# ...
]
Next, we just tell our BookListCreateAPIView to use it. This is another small change that delivers massive value.
books/views.py
from django_filters.rest_framework import DjangoFilterBackend
class BookListCreateAPIView(generics.ListCreateAPIView):
queryset = Book.objects.all()
serializer_class = BookSerializer
# New additions for filtering
filter_backends = [DjangoFilterBackend]
filterset_fields = ['author', 'publication_year']
With this wired up, users can now make powerful, specific requests. Want all books by the author with ID 1? Just hit /api/books/?author=1. Need all books published in 2023? Try /api/books/?publication_year=2023.
Level Up Checkpoint: By adding pagination and filtering, we've transformed our API from a simple data dump into a smart, efficient tool. Users can now navigate large datasets without performance penalties and find exactly what they need with simple query parameters. This isn't just a nice to have feature; it's a fundamental part of a professional API experience.
This approach is highly effective for direct field lookups. For more advanced scenarios, like when you need to customize REST API responses per user, you can build on these foundations to create even more dynamic systems.
Testing Your API Like a Professional
An untested API is a broken API waiting to happen. It's a harsh truth, but one I learned the hard way after a production bug that a single, simple API test would have caught. We spent hours tracking down why certain user data was being corrupted, only to discover a serializer was incorrectly handling a null value on updates.
Manually poking endpoints with Postman is fine when you're starting out, but it's not a real strategy. To build reliable, production grade software, you absolutely have to step into the world of automated testing. This is how you gain the confidence that your API works exactly as you designed it—today, and after every single change you make in the future.
Choosing Your Testing Toolkit
We're going to lean on the tools that the Django community has increasingly adopted. While Django's built in unittest is perfectly capable, the ecosystem has been shifting for a while now.
Developer surveys show a clear trend in the modern Django stack. While PostgreSQL remains the dominant database at 76% usage, the testing landscape shows pytest adoption at around 39%, slightly ahead of the built in unittest. This suggests that developers often pair modern tools like pytest with their Django REST Framework projects.
For this reason, we'll use pytest for its clean syntax and powerful features. When you pair it with DRF's own APITestCase, you get a formidable setup for making API requests directly within your tests.
Writing Our First API Test
Let's write a few tests for our Book endpoints to cover the entire CRUD (Create, Read, Update, Delete) lifecycle. Our goal isn't just to check for a 200 OK response; it's to verify failure conditions too. A solid test suite confirms that your security works and that bad data is properly rejected.
We'll start by creating a test_books_api.py file inside our books app.
import pytest
from rest_framework.test import APITestCase
from rest_framework import status
from django.urls import reverse
from django.contrib.auth.models import User
from .models import Book
@pytest.mark.django_db
class BookAPITests(APITestCase):
def setUp(self):
# Create two users
self.user1 = User.objects.create_user(username='user1', password='password123')
self.user2 = User.objects.create_user(username='user2', password='password123')
    # Create a book owned by user1
    self.book = Book.objects.create(
        title="Test Driven Development by Example",
        author=self.user1,
        publication_year=2002
    )

    # Authenticate as user1 for most tests
    self.client.force_authenticate(user=self.user1)

def test_list_books(self):
    """
    Ensure any authenticated user can list books.
    """
    url = reverse('book list create')
    response = self.client.get(url)
    self.assertEqual(response.status_code, status.HTTP_200_OK)
    self.assertEqual(len(response.data['results']), 1)

def test_create_book_unauthorized(self):
    """
    Ensure anonymous users cannot create books.
    """
    self.client.force_authenticate(user=None) # Log out
    url = reverse('book list create')
    data = {'title': 'New Book', 'publication_year': 2024}
    response = self.client.post(url, data, format='json')
    self.assertEqual(response.status_code, status.HTTP_401_UNAUTHORIZED)
In this initial setup, we use the @pytest.mark.django_db decorator to give our test function access to the database. The setUp method is our staging ground, creating test users and a sample book before any tests run.
Notice self.client.force_authenticate(); this is a DRF helper that simulates a logged in user, saving us from the headache of manually handling tokens in our tests. If you want to dive deeper into building robust test data, check out our hands on workshop for mastering Test Driven Development in Django using factory_boy and faker.
Testing Permissions and Error Cases
Now for the fun part. Let's test our IsAuthorOrReadOnly permission. We need to confirm that user2 cannot modify the book created by user1. This is where tests really start to pay for themselves.
def test_update_book_not_author(self):
"""
Ensure a user cannot update a book they did not create.
"""
# Authenticate as the non author user
self.client.force_authenticate(user=self.user2)
    url = reverse('book detail', kwargs={'pk': self.book.pk})
    data = {'title': 'A Hacked Title', 'publication_year': 2024}
    response = self.client.put(url, data, format='json')

    self.assertEqual(response.status_code, status.HTTP_403_FORBIDDEN)

def test_delete_book_is_author(self):
    """
    Ensure the author of a book can delete it.
    """
    # Authenticated as user1 (the author) from setUp
    url = reverse('book detail', kwargs={'pk': self.book.pk})
    response = self.client.delete(url)

    self.assertEqual(response.status_code, status.HTTP_204_NO_CONTENT)
    self.assertEqual(Book.objects.count(), 0)
This first test is critical. It logs in as user2 and tries to PUT an update to user1's book. The expected 403 Forbidden response confirms our custom permission is working exactly as intended. We then follow up by testing the "happy path"—making sure the actual author can delete their own book.
This kind of automated testing is just one piece of the puzzle. To really deepen your understanding of building robust software, I highly recommend exploring various quality assurance testing methods.
Common Questions About Django REST Framework
As you get comfortable with the Django REST Framework, you'll inevitably run into a few questions that pop up time and time again. I've seen them on forums, in team chats, and I definitely had them myself when I first started.
Let's tackle some of the most frequent ones head on. Think of this as the FAQ section you wish you had from the beginning—the practical answers that clear up the small but critical details.
What's The Difference Between Serializer And ModelSerializer?
This is probably the number one point of confusion for newcomers. The distinction is all about manual control versus automatic convenience.
Think of a serializers.Serializer as building a car from scratch. You have to define every single part yourself: the engine (CharField), the wheels (IntegerField), the chassis, everything. It gives you total control, which is perfect for data that doesn't map cleanly to a Django model, like a custom settings object or an in memory representation.
A serializers.ModelSerializer, on the other hand, is like getting a high quality car kit. You tell it which model you're building (class Meta: model = Book), and it automatically inspects your model and gives you fields for the engine, wheels, and chassis. It dramatically cuts down on boilerplate code for standard CRUD operations.
You can still customize it—add a spoiler, change the paint color—but the heavy lifting is done for you. Honestly, for 90% of the work you do with model backed APIs, you'll reach for ModelSerializer.
When Should I Use ViewSets Instead Of Regular Views?
This choice comes down to specialization versus versatility.
Regular views like APIView or function based views are like specialized tools in your toolbox. You might have one view function for listing items and a completely separate one for handling a single item's details (GET, PUT, DELETE). This approach is perfectly fine for simple endpoints or when you have very custom logic that doesn't fit a standard pattern.
ViewSets, however, are the Swiss Army knife. A single ModelViewSet class can handle listing, creating, retrieving, updating, and deleting a resource all by itself. They are designed specifically for standard, resource based APIs. When you pair a ViewSet with a Router, DRF automatically generates all the URL patterns for you.
My rule of thumb: If you're building a standard CRUD interface for a Django model, start with aModelViewSet. It keeps your code DRY (Don't Repeat Yourself) and your URL configuration incredibly clean. If the endpoint does something highly specific that isn't CRUD, like "recalculate user statistics," a regularAPIViewis a better fit.
How Do I Handle Nested Relationships In My API?
This is a classic "it depends" scenario, but there's a clear progression of solutions. Sooner or later, you'll want to show an author's details directly inside a book's JSON response instead of just their ID.
Here are your main options, from simplest to most powerful:
- The Quick Fix
depth: You can adddepth = 1to yourModelSerializer's Meta class. This tells DRF to go one level deep and serialize the related author object. It's fast but clumsy, as it serializes all fields and can lead to over fetching, performance issues, and accidentally exposing sensitive data. Use it sparingly. - The Professional Way: Nested Serializers: The right way to do it is to create a separate
AuthorSerializerand then use it as a field inside yourBookSerializer, like this:author = AuthorSerializer(read_only=True). This gives you precise control over exactly which author fields are included in the response. It's the most common and balanced solution. - The Power Move:
SerializerMethodField: For truly custom representations, like combining an author's first and last name into a singlefull_namefield, you can use aSerializerMethodField. This lets you write a custom Python method (get_full_name) to generate the exact nested data you need, giving you maximum flexibility.
For most cases, start with nested serializers. They offer the best balance of control, performance, and maintainability for building clean and efficient APIs.
Ready to move beyond the tutorial and build truly robust, scalable systems? At Kuldeep Pisda, I specialize in helping startups accelerate their roadmaps with expert Django and full stack engineering. Whether you need to strengthen your technical foundations, architect a production grade API, or integrate advanced AI features, I can help.
Explore my consulting services at https://kdpisda.in and let's build something remarkable together.
Subscribe to our newsletter.
Become a subscriber receive the latest updates in your inbox.
Member discussion