

Picture this: it's a quiet Tuesday afternoon. Too quiet. A frantic Slack message pops up from a junior developer. "Uh, guys... I think I might have just tried to delete the production database."
We've all felt that cold sweat, right? That heart in your throat moment when a simple command goes horribly wrong.
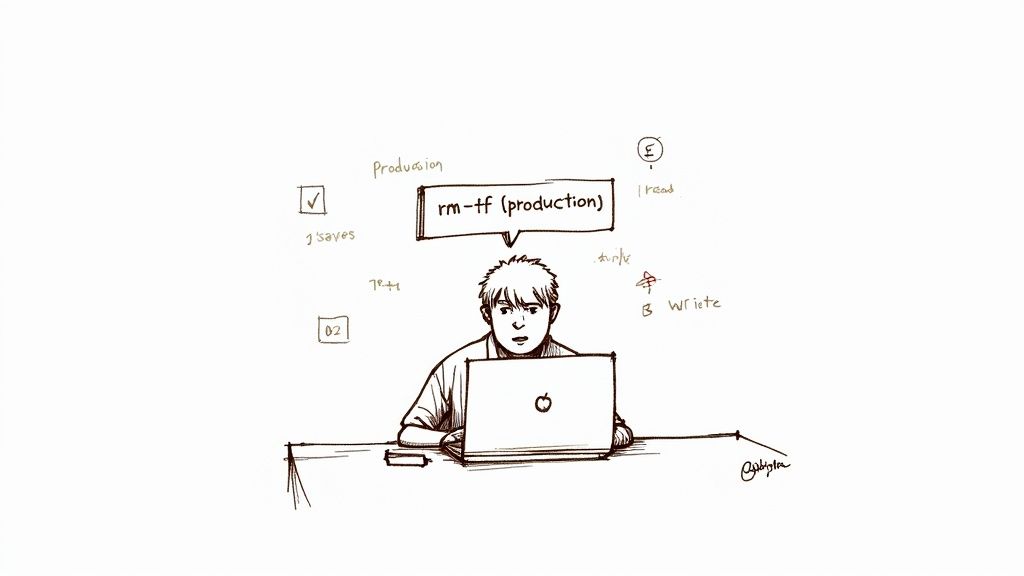
A senior engineer's lightning fast intervention saved the day, but the damage was done to our collective calm. That near miss was our wake up call. It was the moment we realized our approach to permissions wasn't a system; it was a patchwork quilt of ad hoc decisions, stitched together with hope and good intentions. It was the exact moment "this is fine" morphed into "we need a real plan, right now."
This is the story of how we moved from that chaos to a solid role based access control implementation. It's less about a single technical fix and more about a fundamental shift in how you think about security and user management. Let's walk through that journey together.
The Chaos of Ad Hoc Permissions
Before that incident, our approach was purely reactionary. A new person joined the team, and we'd just clone the permissions of someone with a similar job title. You can probably guess how that turned out. Over time, this created a tangled mess of privileges that nobody fully understood.
This ad hoc method led to a few predictable, and dangerous, problems:
- Over Privileged Users: Nearly everyone had more access than they needed to do their job. This dramatically increased the blast radius for simple mistakes.
- Security Blind Spots: We couldn't confidently answer a basic question like, "Who can access this sensitive customer data?"
- Operational Nightmares: Onboarding new hires was slow and riddled with errors. Offboarding was even worse; we were never 100% sure we had revoked all of a former employee's access, leaving potential security holes wide open.
That close call really hammered home the need for robust access controls. If you want to go deeper on mitigating these kinds of risks from the inside, check out this ethical proactive guide to preventing insider threats.
Honestly, the idea of moving to a formal RBAC system felt daunting. We worried about the migration effort, the risk of breaking existing workflows, and the engineering time it would take away from building features. But the risk of another "oops, production" moment was far, far greater. The rest of this guide will walk you through the exact journey we took, from designing the data model to rolling it out without causing a full blown panic.
Designing Your RBAC Data Model Without Overthinking It
Alright, let's pause for a moment. Before you write a single line of code for your new access control system, you need a blueprint. This is the stage where I've seen countless teams get completely paralyzed. They pull up a whiteboard and design something so intricate, trying to account for every possible edge case, that it becomes a monster before it's even born.
We are not going to do that. Let's sidestep that common trap.
The goal here isn't to create a perfect, infinitely flexible model from day one. It's to build a simple, powerful, and, most importantly, maintainable foundation that you can actually build on.
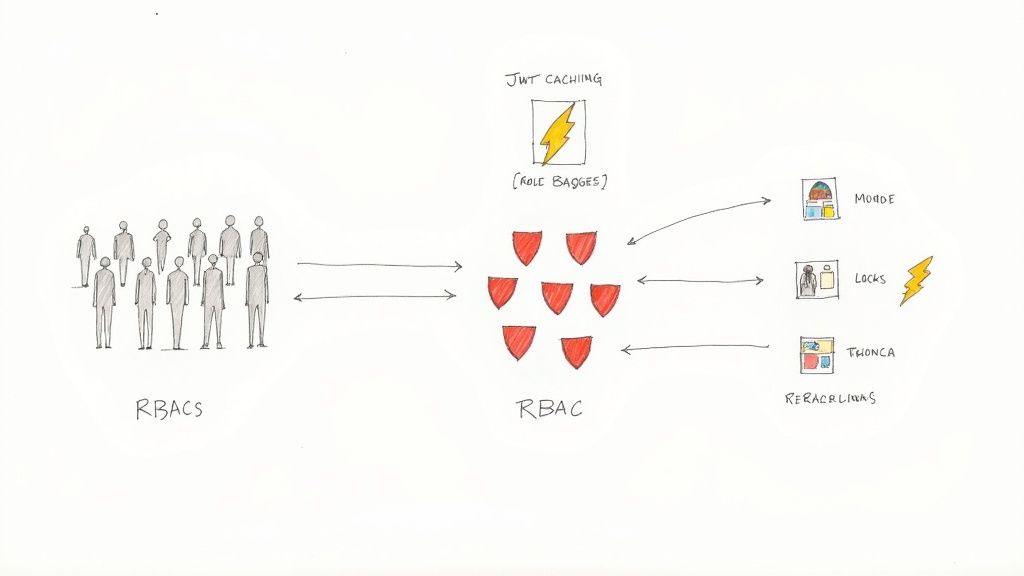
The Three Pillars of a Solid RBAC Model
At its heart, any solid RBAC system is built on just three core concepts: Users, Roles, and Permissions.
Think of them like this:
- Users are the actual people who need access to your system (e.g., [email protected]).
- Roles are job functions or titles that group permissions together (e.g., 'Editor', 'Support Agent', 'Admin').
- Permissions are the specific, granular actions a user can take (e.g., 'can_edit_article', 'can_view_dashboard').
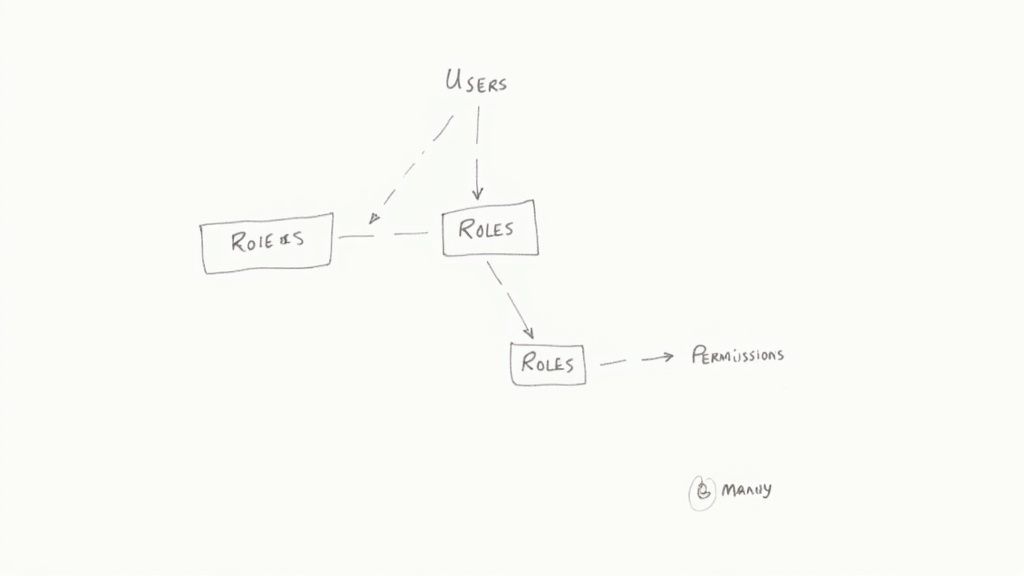
The magic happens in how these three pillars connect. A User has one or more Roles, and a Role has one or more Permissions. Crucially, you should never assign a Permission directly to a User; the Role acts as the critical intermediary.
This structure is built on two key database relationships that form the backbone of the entire system.
The most critical relationship in this model is many to many. A user can have multiple roles, and a single role can be assigned to multiple users. Likewise, a role can contain many permissions, and a single permission can belong to multiple roles.
Getting this relationship right is absolutely fundamental to building a flexible system. I once spent hours debugging why a user couldn't access a feature, only to realize I had set up a one to many relationship by mistake. If you want to brush up on the specifics, we have a helpful guide on mastering the many-to-many relationship that dives deeper into the technical implementation.
From Whiteboard Sketch to Concrete Schema
When we first designed our own system, the initial whiteboard sketch was literally just three boxes labeled 'User', 'Role', and 'Permission' with lines connecting them. It doesn't need to be more complicated than that to start.
From there, we translated that simple drawing into a tangible database schema. To make this really concrete, here's a look at the essential tables you'd need to get this off the ground.
Core RBAC Data Model Components
| Model (Table) | Purpose | Key Relationships |
|---|---|---|
| Users | Represents an individual account in your system. | One to many with UserRoles (a user can have many role assignments). |
| Roles | A named collection of permissions, representing a job function. | Many to many with Permissions via the RolePermissions join table. |
| Permissions | Defines a specific, atomic action that can be performed. | Many to many with Roles via the RolePermissions join table. |
| UserRoles (Join Table) | Links users to roles, creating the many to many relationship. | Foreign keys to both Users and Roles. |
| RolePermissions (Join Table) | Links roles to permissions, creating the many to many relationship. | Foreign keys to both Roles and Permissions. |
This structure is elegant and incredibly powerful. It allows you to define a set of permissions, bundle them into logical roles, and then simply assign those roles to your users. When you need to change what an 'Editor' can do, you just modify the 'Editor' role, and every single user with that role is instantly updated.
No more manually updating permissions for hundreds of individual accounts. That's a game changer.
A Quick Word on Avoiding Role Sprawl
It's tempting to create a new role for every tiny variation in access needs, but this leads to a nasty problem called role sprawl. Before you know it, you have more roles than users, and the system becomes just as confusing as the ad hoc mess you were trying to replace.
I've seen companies with over 2,000 roles for fewer than 500 employees—an administrative nightmare with zero real security benefit. The best way to avoid this is to implement good governance from day one. In fact, organizations that conduct regular role reviews can often slash their total role count by 50% to 70%.
To sidestep this trap, follow one simple rule: create roles based on job functions, not individual people.
If you find yourself creating a "Jane Doe Role," stop. Ask if a more generic role like "Marketing Manager" or "Content Strategist" would work instead. This discipline will keep your data model lean and your sanity intact as your team and application grow.
Enforcing Permissions Where It Actually Matters
Okay, we've designed a beautiful, clean data model on a whiteboard. Maybe you've even coded up the Django models for it. Feels good, right? But right now, that model is just a theory. It's a blueprint that doesn't actually do anything until we connect it to the real world of API requests and user clicks.
This is the part of the journey where abstract rules become tangible, production grade security. We're turning our design into the bouncer at the club door of our application, checking IDs and turning people away when they aren't on the list. This is where we write the code that generates those oh so satisfying "403 Forbidden" responses.
Choosing Your Enforcement Points
Think of your application as a building with many rooms. Some rooms, like the lobby, are open to everyone. Others, like the server room, need a keycard and a fingerprint scan. The big question is, where do you put the security guards?
You have a few strategic options, and each comes with its own trade offs.
Your main enforcement points are typically:
- API Middleware: This is the security guard at the main entrance of the building. Middleware intercepts every single incoming request before it even touches your main application logic. It's fantastic for broad, application wide checks, like "Is this user even logged in?"
- View Level Decorators/Permission Classes: Think of this as a guard posted at the door of a specific room. These checks are far more granular and only apply to a particular API endpoint. They're perfect for enforcing role specific rules like, "Only an 'Admin' can access this."
- Template Logic (Frontend): This is just about hiding the doors to rooms a user shouldn't enter anyway. If a user doesn't have the
can_edit_articlepermission, they should never even see the 'Edit' button. This is purely for a better user experience, not a real security layer.
A critical lesson I learned the hard way: frontend checks are for user convenience, while backend checks are for actual security. Never, ever rely solely on hiding a button in the UI to protect a sensitive endpoint. A determined user can always bypass the frontend and craft their own API request.
A Practical Example with Django Rest Framework
Let's make this concrete. We're going to build a custom permission class in Django Rest Framework (DRF) that uses our RBAC model to lock down an API endpoint. This is the code that breathes life into our data model.
Let's say we have an endpoint for creating a new blog post. We only want users with the 'Editor' role to be able to use it.
Here's how you could write a custom permission class to enforce this rule.
# permissions.py
from rest_framework.permissions import BasePermission

class HasRolePermission(BasePermission):
    """
    A custom permission to only allow users with a specific role.
    """
    def has_permission(self, request, view):
        # Rule #1: They absolutely must be authenticated.
        if not request.user or not request.user.is_authenticated:
            return False

        # Get the role we require from the view itself.
        required_role = getattr(view, 'required_role', None)
        if not required_role:
            # If a view using this permission doesn't specify a role,
            # deny access by default. Safety first.
            return False

        # Check if the user has the required role.
        # This assumes you have a 'roles' many-to-many field on your User model.
        return request.user.roles.filter(name=required_role).exists()
This simple class does three things: it verifies the user is logged in, it looks for a required_role attribute on the API view it's protecting, and finally, it hits the database to see if the user has that role. It's clean, reusable, and plugs directly into the data model we already designed.
Connecting the Permission Class to a View
Now, we just need to apply this permission class to our API view. In DRF, this is as simple as adding it to the permission_classes list.
# views.py
from rest_framework.views import APIView
from rest_framework.response import Response
from rest_framework import status
from .permissions import HasRolePermission

class BlogPostCreateView(APIView):
    # This is the magic line. DRF will run our custom permission check.
    permission_classes = [HasRolePermission]

    # We define the specific role needed for this view right here.
    required_role = 'Editor'

    def post(self, request, *args, **kwargs):
        # The logic to create a blog post goes here.
        # This code will only execute if the HasRolePermission check passes.
        return Response(
            {'message': 'Blog post created successfully!'},
            status=status.HTTP_201_CREATED
        )
And just like that, our RBAC system is alive and kicking. If a user without the 'Editor' role tries to POST to this endpoint, they'll get a clean 403 Forbidden error, and our data stays safe.
This is a powerful pattern because it separates our business logic (creating a post) from our security logic (checking roles). For a deeper look into how DRF handles security, our guide to Django Rest Framework authentication offers some great insights.
Middleware vs. Granular Checks: The Great Debate
So, when should you use broad middleware checks versus these granular, per view checks?
Think of it as a funnel. Middleware is great for the wide top of the funnel, handling coarse grained rules that apply to almost everything:
- Is the user logged in at all?
- Does the user belong to the correct organization/tenant?
- Is the user's account active or has it been suspended?
Per view permission classes are for the narrow bottom of the funnel. They handle the fine grained, context specific rules:
- Does this user have the
can_delete_invoicepermission? - Can an 'Editor' access this endpoint, but not an 'Author'?
The best approach is almost always a combination of both. Use middleware to weed out invalid requests early, which is highly efficient. Then, use specific permission classes to handle the nuanced logic for each individual endpoint. This layered strategy is both performant and secure.
To truly enforce permissions effectively, companies often hire a dedicated access control specialist to design and maintain these layers as the system grows.
Using JWT Claims to Keep Your System Fast
So, you've got your data model locked down and your enforcement points are live, protecting your application. It feels like a huge win. But I remember staring at our performance monitoring tools a week after our initial rollout and seeing a worrying trend: a slow, steady climb in database query times.
Every single API request was hitting the database just to check the user's roles. One request, one check. A hundred requests, a hundred checks. While it worked, it was a classic performance bottleneck just waiting to explode. Constantly querying the database for the same permission info over and over is a recipe for a sluggish app, and it's a common hurdle in any role based access control implementation.
The fix? Stop asking the database every time. Instead, you can give the user a "permission slip" when they log in and have them show it with every request. This is exactly what JSON Web Tokens (JWTs) were made for.
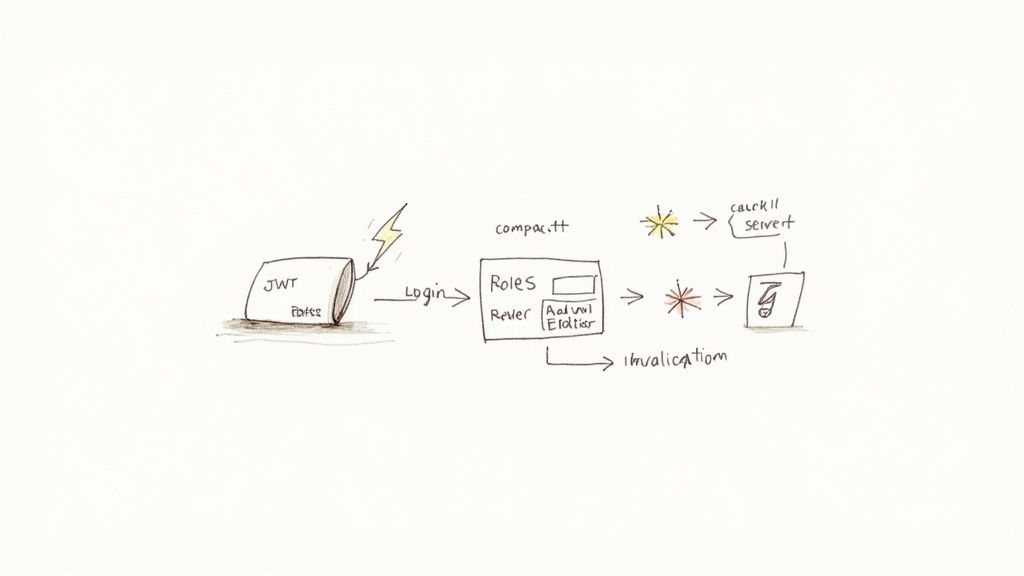
Embedding Roles Directly into the JWT Payload
The idea is simple but powerful. When a user authenticates, you look up their roles and permissions just once. Then, you embed that information directly into the JWT payload as a custom claim before signing it and sending it to the client.
From that moment on, every API request carrying that token already contains all the authorization data you need. No more database trips. Your permission checks become almost instant because you're just reading data from a digitally signed token that's already in memory.
If you're new to the technology, it's worth taking a moment to understand what JWTs are and how secure they are before diving deeper.
Here's a practical example of how you might customize a JWT payload to include a roles array in Django.
# Example using a library like djangorestframework-simplejwt

from rest_framework_simplejwt.serializers import TokenObtainPairSerializer

class MyTokenObtainPairSerializer(TokenObtainPairSerializer):
    @classmethod
    def get_token(cls, user):
        token = super().get_token(user)

        # Add custom claims
        # This assumes your User model has a 'roles' many-to-many field
        roles = list(user.roles.values_list('name', flat=True))
        token['roles'] = roles

        return token
With this tweak, a decoded JWT payload now looks something like this:
{
  "token_type": "access",
  "exp": 1678886400,
  "jti": "a_unique_identifier",
  "user_id": 123,
  "roles": ["Editor", "CommentModerator"]
}
Now, our HasRolePermission class can be updated to check this token payload instead of hammering the database, making it incredibly fast.
The Million Dollar Question: What About Stale Data?
This all sounds great until you hit the inevitable "what if" scenario. What happens when an admin demotes a user from 'Editor' to 'Viewer'? Their JWT is still floating around with the old 'Editor' role baked into it, perfectly valid until it expires.
This is the classic cache invalidation problem, and it's a critical trade off. JWTs are stateless by design, that's what makes them fast. But that stateless nature also makes them notoriously difficult to revoke.
You have a few solid options, each with its own pros and cons:
- Short Lived Tokens: Keep your access tokens very short lived, say 5 to 15 minutes. When a role changes, the old token becomes invalid pretty quickly. It's simple, but it can be slightly disruptive for users who have to refresh their tokens more often.
- A Token Blocklist: When a user's roles change, you can add their token's unique identifier (the
jticlaim) to a blocklist in a fast cache like Redis. Your permission check then adds one quick lookup to this blocklist, a tiny bit of overhead, but still much faster than a full database round trip. - Forcing a Logout: This is the most direct approach. When a critical role change happens, you can implement a mechanism to remotely invalidate the user's session, forcing them to log in again and get a fresh token with the correct roles.
There's no single "right" answer here. The best strategy depends entirely on your application's security requirements. For most systems, a combination of short lived access tokens and a long lived refresh token strategy strikes a great balance between performance and security.
Getting this performance optimization right is crucial, especially as RBAC adoption skyrockets. The global market for these solutions topped USD 8.5 billion in 2022 and is projected to keep growing, fueled by cybersecurity needs and the move to the cloud. This trend underscores the importance of building systems that aren't just secure but also highly performant.
Rolling It Out Without Breaking Everything
Okay, let's be honest. Implementing a new RBAC system in a live production environment can feel like changing the engine on a plane while it's in the air. It's one of the most nerve wracking parts of the entire process. Your data model can be perfect and your JWTs lightning fast, but none of that matters if flipping the switch causes chaos for your users.
This is the part where we talk about mitigating that risk. It's a story about being obsessively careful, testing until you're absolutely confident, and rolling out a foundational security change with zero downtime.
Running in Shadow Mode First
The single most important decision we made was to not go live all at once. We decided to deploy the new RBAC system in what's called shadow mode. This just means the new system runs in parallel with the old one, but its decisions don't actually block anyone from doing anything.
Here's how it worked for us: for every single incoming request, we'd check permissions using both the old, messy system and our shiny new RBAC model.
- If both systems agreed on the outcome, great. The request went through as normal.
- If they disagreed, we logged everything about the discrepancy: the user, the endpoint, the old permissions, and the new roles that were checked.
Crucially, the old system still had the final say. This let us catch every edge case, every forgotten permission, and every user who somehow fell through the cracks of our migration plan, all without a single person noticing a thing. It was a production grade dress rehearsal.
The Art of the Data Migration Script
While shadow mode was humming along in the background, we had another critical task: writing the data migration scripts. This is the code that translates your old, ad hoc permissions into the new, structured world of roles. It's a one time script, but it has to be perfect.
Our process was pretty methodical:
- Analyze Old Permissions: First, we ran a ton of queries to group users by their existing permissions. We were looking for common patterns that would naturally become our new roles.
- Define Role Mappings: With the patterns identified, we created a clear mapping. For instance, anyone with the old
can_edit_postandcan_publish_postflags would be mapped to the new 'Editor' role. Simple. - Write Idempotent Scripts: Our scripts were designed to be idempotent, meaning we could run them multiple times without causing issues. They'd always check if a user already had a role before trying to assign it again.
- Test in Staging: We cloned our production database to a staging environment and ran the scripts over, and over, and over. We kept refining them until they worked flawlessly every time.
This disciplined approach is vital. It's a lot like the discipline needed to build a solid deployment pipeline. In fact, many of the same principles overlap with what we cover in our guide on 10 continuous integration best practices.
You Can't Over Communicate
Seriously, you cannot over communicate during a change like this. We spun up a temporary Slack channel and held weekly check ins to keep everyone, from engineering to product to support, in the loop.
We explained what we were doing, why it mattered, and what to expect. This wasn't just about giving updates; it was about building trust and turning the rest of the company into allies. When the support team knows a big change is coming, they're prepared for any user questions that might pop up, which makes everyone's life easier.
The rollout of a role based access control implementation is as much a communication and planning challenge as it is a technical one. Don't underestimate the human side of the equation.
A gradual, phased rollout is always safer than a single, high stakes deployment. Here's a quick comparison of the two approaches.
Phased RBAC Rollout Strategy
| Phase | Phased Rollout (Recommended) | Big Bang (High Risk) |
|---|---|---|
| Phase 1: Shadow Mode | New RBAC runs in parallel, logging discrepancies. Old system is still in control. Zero user impact. | All users are switched to the new system at once. |
| Phase 2: Internal Rollout | Enable new RBAC for a small group of internal users or a specific, low risk team first. | All external and internal users are migrated simultaneously. |
| Phase 3: Beta Group | Roll out to a small percentage of external users (5% 10%) who have opted into a beta program. | No beta group. The system is either on or off for everyone. |
| Phase 4: Gradual Increase | Slowly increase the percentage of users on the new system (25%, 50%, 75%) over days or weeks. | The switch is flipped, and 100% of traffic hits the new system immediately. |
| Phase 5: Full Rollout | Once at 100%, monitor for a few days before decommissioning the old system. | The old system is turned off the moment the new one goes live. No fallback. |
The choice is pretty clear. The phased approach gives you multiple opportunities to catch issues with minimal blast radius, while the big bang approach is basically a gamble.
Creating Audit Logs for Compliance and Security
One of the biggest wins from a proper RBAC system is the ability to create crystal clear audit trails. As part of our rollout, we made sure to implement robust logging for any action that changed a user's access.
Whenever an admin assigned a role, revoked a role, or modified a role's permissions, we logged:
- Who made the change (the admin).
- What was changed (e.g., "Assigned 'Editor' role").
- To whom the change was applied (the target user).
- When it happened (a precise timestamp).
This audit log isn't just a "nice to have." It's absolutely essential for security investigations and meeting compliance standards like GDPR or HIPAA.
After weeks of running in shadow mode, refining our migration scripts, and keeping the team in the loop, we were finally ready. We flipped the switch, and because we had done all the prep work, it was an incredibly quiet, uneventful deployment.
And in the world of infrastructure changes, "uneventful" is the most beautiful word you can hear.
Lessons Learned: Answering the Tough RBAC Questions
Even the best laid plans for an RBAC system will run into a wall of "what ifs." I've been there. After doing this a few times, I've seen the same practical hurdles trip up teams right before a big launch. This isn't about theory anymore; it's about the messy, real world edge cases you'll actually face.
Think of this as the frank advice I wish someone had handed me years ago. This is the stuff you learn from shipping code, not just reading docs.
How Do You Handle Dynamic Permissions?
The first question that almost always pops up is how to manage permissions that change based on what a user is trying to access. For example, a user might be an 'Editor' for their own articles but just a 'Viewer' for everyone else's.
This is where your permission checks have to get smarter. A simple user.has_role('Editor') check won't cut it. You need to graduate to something like user.has_permission('edit', article_object). This is often called object level security.
Your permission logic now has to do a bit more work:
- First, load the actual object being requested (e.g., the specific blog post).
- Next, check the user's role specifically in the context of that object. Do they own it? Are they part of the team that owns it?
- Finally, return a decision based on both their role and their relationship to the object.
It adds a layer of complexity, sure, but it's absolutely essential for any system where users own or manage their own resources.
What About Exceptions for Specific Users?
Sooner or later, someone will ask for a special one off permission that doesn't fit into any of your carefully crafted roles. A senior manager might need temporary access to a specific financial report, for instance. My advice? Resist the temptation to create a new role like "Jane Doe's Special Report Role."
That path leads straight to role sprawl, a maintenance nightmare where you have dozens of micro roles that nobody understands.
A much better approach is to grant the specific permission directly to the user, but, and this is critical, with a clear audit trail and an expiration date. This keeps your core roles clean and predictable while still handling legitimate business needs. The key is to make these exceptions visible and temporary.
This visual breaks down the high level migration process, from safely testing in the background to finally flipping the switch.
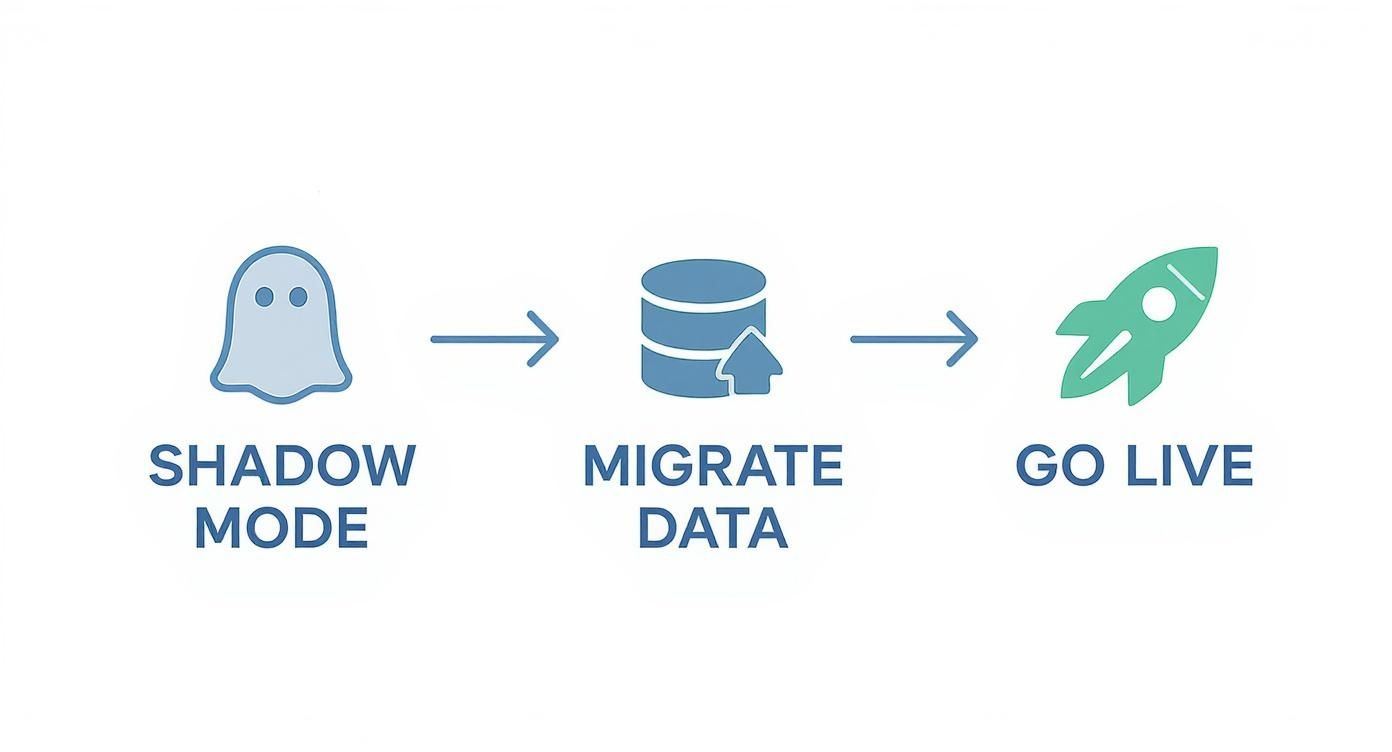
Moving from shadow mode to a full launch is all about mitigating risk. You want to be absolutely certain everything works before you commit.
How Should We Test All This Logic?
Testing RBAC can feel overwhelming. How can you possibly cover every combination of user, role, and action? The trick is to lean heavily on factory based testing.
Using a library like factory_boy in the Django world, you can programmatically spin up users with any role you need. Your test suite should be relentless.
- Test the happy path: Create a user with the 'Editor' role and assert they can hit the editing endpoint.
- Test the "you shall not pass" cases: Create a user with the 'Viewer' role and assert they get a 403 Forbidden when they try that same endpoint.
- Test the strangers: Assert that a logged out user gets a 401 Unauthorized error.
When you build a comprehensive suite of these tests, you can refactor your RBAC system with confidence. You'll know instantly if you've accidentally opened up a security hole.
Key Takeaways for Your Own Journey
- Start with a story: Don't just implement RBAC because you're supposed to. Identify a real pain point, like a near disaster or a compliance headache, to motivate the change.
- Keep the model simple: Your foundation should be Users, Roles, and Permissions connected by many to many relationships. Avoid complexity until you absolutely need it.
- Enforce on the backend: Frontend UI changes are for user experience; true security happens on the server. Use middleware for broad checks and per view permissions for granular rules.
- Use JWTs for speed: Embed roles into your JWT claims to avoid constant database lookups, but have a clear strategy for handling stale tokens.
- Roll out with caution: Use a phased approach with shadow mode, idempotent migration scripts, and constant communication. "Uneventful" is the goal.
Let's build something solid.
Are you an early stage startup looking to build a robust, secure, and scalable application? My name is Kuldeep Pisda, and I provide expert consulting and hands on engineering to help you accelerate your roadmap and strengthen your technical foundations. Let's build something great together.
Subscribe to our newsletter.
Become a subscriber receive the latest updates in your inbox.
Member discussion